
xsynth - MIDI Musical Keyboard
[Source Code]
Introduction
xsynth is an X-Windows application which interfaces to the soundcard's
FM synthesizer and the MIDI port. It has a Motif GUI which provides a keyboard
like interface with 49 piano style buttons. The features are:
- 128 preloaded instruments (compiles with General MIDI patch maps)
- Octave transpose control
- Mouse click or mouse drag mode to play notes
- Sustain/Vibrato/Tremolo and Depth control
- MIDI Recording and Playback
- Pitch bend, Playback speed and Volume controls
- 18 multi-timbral stereo voice channels.
- Drum Synthesizer section with tempo and volume control.
- Records up to 100000 notes and playback with speed control.

Main Keyboard Section
The main keyboard section consists of 49 piano style keys. There are
29 white keys and 20 black keys. These keys can be activated in several
ways:
- Clicking the left mouse button on the key (Drag off mode)
- Dragging the mouse button over the key (Drag on mode)
- Pressing a computer keyboard key (See table below)
- Pitch Control - This slider can be dragged up or down to change
the pitch of the note(s) being played. Releasing the slider returns it
to the center position.
- Speed Control - This slider affects the speed of notes played
back either from the MIDI file player or after they have been recorded.
- Main Volume - This slider sets the output volume level of all
notes played on the synthesizer.
The computer's keyboard also serves as input the synthesizer.
The following is a map between the computer's keyboard keys and the synthesizer
notes. The keyboard supports four octaves. The octaves can be transposed
by pressing the Shift key and pressing the computer keyboard
key.

Channel Selector Channel buttons are used to associate instrument patches
to channels in the FM synthesizer. The FM synthesizer is capable of 18
simultaneous channels. In other words, 18 instruments can be simultaneously
played. In order to achieve stereo separation on channels, the following
allocation of channels to the left, right and center stereo output is shown
below:

Instrument Loading
In order to play a sound on the synthesizer, you have to first load
an instrument on one of the 18 channels. Basically, any channel can be
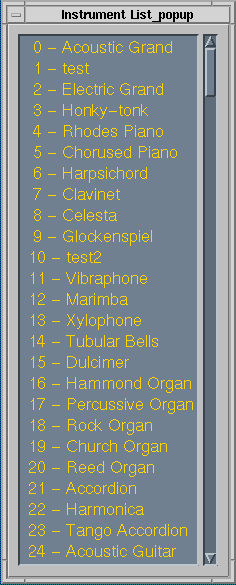
loaded with any of the 128 Instruments. To obtain a list of the instruments
available to the synthesizer, press the Show button. This will pop up a
window with a list of instruments ordered In General MIDI specifications.
To load an instrument, you must select a Channel by toggling it on and
then entering the number of the instrument on the numeric keypad. Once
the Instrument is loaded, the instrument number appears on the channel.
Now pressing any keyboard key will sound the Instrument.
Load - This button will load an instrument patch map File called
sbi.def. This file specifies the position where the instrument should be
loaded and the file name of the Instrument patch. The instrument patch
is stored in a format called Audioware/6000 instrument (files with a ".sbi
extension). The format of sbi.def is as follows:
<Patch Number> <Instrument Name> <SBI File Name> e.g.: 25 Weird wierd.sbi
Patch Number a number from 0 to 255. Instrument Name is the descriptive
name of the instrument (no spaces in the name) and SBI file name is the
name of theUNIX file containing the .sbi format patch. Note that the new
instrument patch map will override any of the preprogrammed entries.
Show - This button pops up a scrolled window containing the numerical
list of Instrument patched currently loaded. To close the Instrument list,
press the Show button again (use the window manager to move the popup show
window to uncover the Show button).
In order to load an Instrument on an FM channel follow the steps below:
- Select a channel (left, right or center) from the Channel Selector
section.
- Now enter the selected Instruments number on the Numeric Keypad. Press
Enter on the keypad and observe that the number appears on the channel
selector button. Pressing the Cancel button permits the user to rectify
errors while entering Instrument numbers.
- Repeat steps 1 and 2 for different Instruments and different channels.
You may program up to 18 instruments on the synthesizer. Depending on the
FM channel number, the instrument is sounded on the left, right or center
audio output channel.
Recording and Playback
This section contains buttons to record notes so that they can be played
basic in arpeggio form or simply backing sound. This section has various
gadgets to reset the synthesizer and display system messages and a power-off
button.
- Display - Function display panel.
- Displays Instrument name when an instrument is loaded.
- Displays record/play/reset status.
- Displays errors.
- Power - Pressing this button terminates the FM synthesizer program.
- Reset - This is the system reset button. pressing this button
will reinitialize the entire FM synthesizer.
- Play - Pressing this button will cause notes previously recorded
to be played. Playback of notes Is an endless loop. The speed of the playback
can be controlled by the Speed Control slider. Pressing the Play button
again will stop playing.
- Record - Pressing the button will start recording of notes as
they get played. Pressing the Record button a second time will stop the
recording process.
Keyboard Control
The keyboard control section allows the user to change the characteristics
of the keyboard. There are four modes for playing notes on the keyboard.
The default mode Is similar to a piano In which the note remains voiced
while the key Is pressed. As soon as the key is released, the note Is tuned
off. In the polyphonic mode, each note Is played on a different FM channel.
Hence It is possible to play chords In this mode. In the Drag mode, the
user must simply drag the mouse over the keyboard keys to play the note.
This mode enables the user to play a piano roll. In the resonance mode,
the note remains voiced even after the key is released. The note will remained
sustained or will gradually decay depending on the characteristics of the
instrument. The octave transpose buttons enable the user to set the keyboard
octave. The keyboard supports 4 octaves at any given time. Hence the first
White key will set the octaves for the rest of the keyboard.
- Octave Display - Displays the current octave of the starting
White key of the keyboard.
- Octave Down - Decreases the octave of the starting White key
of the keyboard.
- Octave Up - Increases the octave of the starting White Key of
the keyboard.
- Drag - Pressing this button puts the keyboard In a roll mode.
Notes are played as soon as the mouse enters the White or Black key. Dragging
the mouse across the face of the keyboard produces a roll effect.
- Resonance - This causes the note to remain keyed until a new
note is played. In the default mode, the note is keyed only until the button
is pressed. Releasing the button will key-off the note.
Effects Control
- Sustain - When this button is activated, the FM synthesizer
sustains the current note being played. All channels In an “ON” state will
be affected.
- Vibrato - When this button Is activated, a vibrato effect is
applied to the current note. All channels In an “on” state will be affected.
- Tremolo - When this button is activated, a tremolo effect is
applied to the current note. All channels in an “ON” state will be affected.
- Depth - When this button is activated, the depth of the vibrato
and tremolo effects is increased thereby producing more noticeable sound.
All channels in an “ON” state will be affected.
MIDI Control
The MIDI control allows the user to read MIDI data directly from an
attach MIDI keyboard and play the notes on the FM synthesizer and playback
MIDI files on the FM synthesizer or the Wave-Table synthesizer.
- FM-Port - When “FM-Port” is displayed on this button, all the notes
will be played on the FM synthesizer. When “Wave-Table” is displayed on
this button, all the notes will be played on the Wave-table daughter card
as well as any external MIDI device.
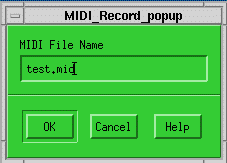
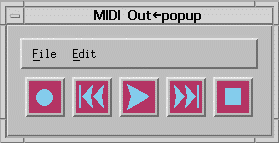
- MIDI - This button pops up a MIDI file player section. This section
consists of file selection buttons with a Play and a Stop button. Press
this button again to close the MIDI file player section. It also permit
you to record MIDI events from an external MIDI keyboard and play notes
on the synthesizer.
To play a MIDI file follow the steps below:
- Click the mouse on a MIDI file (in the files window) and then press
the OK button.
- Now press the Play button. The channels used In the MIDI file will
turn blue while ail other channels will be disabled. The synthesizer will
start playing music from the MIDI file.
- You may dynamically change the instrument on any channel by timing
On the channel and entering the instrument number from the numeric keypad.
- The speed of the playback can be controlled by sliding the Speed slider.
- The percussion section In the MIDI file can be turned on and off by
pressing the On/Off button In the Rhythm section.
- Pressing the Stop button suspends the playback. Pressing the Play button
resumes playing the MIDI file.
- Pressing the fast-forward button advances the MIDI file
- Pressing the rewind button reverses the MIDI file
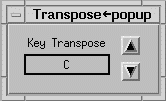
- Pressing the Transpose button allows you to change the note transpose
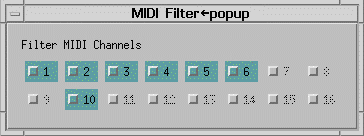
- Pressing the Filter button pops up a panel in which there are 16 toggle
buttons to toggle on and off the active MIDI channels
- Pressing the Octave control buttons allows you to change the octave
of the MIDI file
- Sliding the volume control allows you to change the volume of the MIDI
file.
- Sliding the speed control allows you to change the tempo of the MIDI
file.
Rhythm Programming
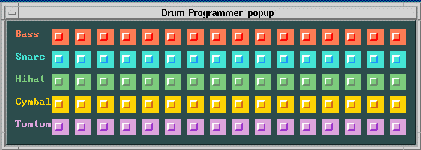
This section permits the user create basic rhythm patterns using 5 percussion
instruments on a 16 beat grid. The drum programmer is interactive and can
be dynamically changed while the rhythm is playing. The tempo control slider
can be used to speed up or slow down the tempo of the rhythm. The volume
control slider can control the volume of percussion instruments. Finally,
the drum pattern can be reset by a single press of the reset button
In order to play the percussion instruments, follow the steps below:
- Press the Program button. The will pop up a percussion map grid shown
above. To close the percussion grid window, press the Program button again
(use the window manager to move the grid to uncover the Program button).
- Now start pressing the buttons for each of the five percussion instruments.
- Set the tempo by sliding the Tempo slider. You may change the volume
of all the percussion Instruments by sliding the Volume slider.
- Now press the On/Off toggle button. This will start playing the percussion
instruments.
You may change the pattern dynamically. The drum programmer will follow
the pattern set In a round robin manner. To close the drum programmer grid,
press the Program button again. To reset all the percussion Instruments,
press the Reset button and this will erase the pattern from the grid.


